22 Apr How To: Increase And Improve Your iDevice Storage Space
Do you always seem to run out of storage on your Apple device?
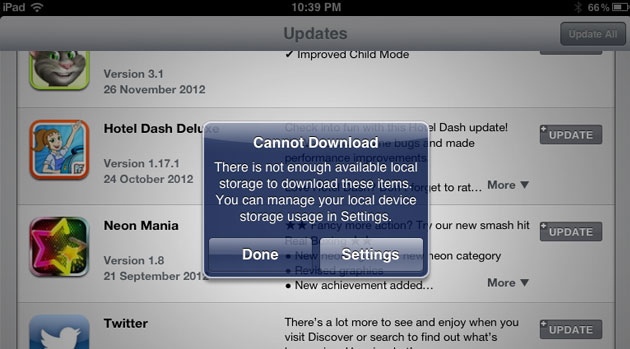
Unfortunately, unlike several of its Android counterparts, you can’t make use of a SD card to expand the storage for your iDevice. The storage size you buy is the storage size you’re stuck with.
To make matters worse, the full 8, 16, 32 or 64GB is not available for use. iOS 7 takes up roughly 1GB of storage, and every time you wirelessly update to the latest version of iOS, between 2 to 3GB of free storage is required to unpack and install the update on the device. This means that you should always keep around 3GB of storage available, particularly when a new update is announced.
So, between all of your media files, apps, documents and of course keeping some storage free for iOS updates, it’s very easy to run out of space on your device.
Don’t get stuck without space for your new media files and important documents. Here are our tips for making the most of your storage space on your iOS 7 Device.
Delete Everything You Don’t Need
This is quite an obvious first step but no matter how basic and obvious this solution might seem, there will still be things saved on your phone that you don’t need or even want.
First things first, you need to work out exactly what is sucking up all of your space. You can do this by opening Settings> General> Usage. This will show a list of which applications you have and exactly how much space they use.
Once you’re looking at the list, you’ll probably see a whole host of things that you’ve never really used.
[one_third]

[/one_third] [one_third]

[/one_third] [one_third_last]

[/one_third_last]
To delete an app:
- Tap on the app
- This will open a new page with the app’s details and a delete option.
- Tap Delete App
- A box will appear with options, “Delete App”or “Cancel”
- Tap “Delete App.”
The Usage section of settings will also show you exactly how much space your content, such as media files and documents, takes up. Using this feature, you can determine where you need to do a bit of spring cleaning – if you have 15 GB of photos, it could be time to cull a few.
Using A Cloud Storage Service
Utilising cloud storage services and apps are a great way to create more storage space without having to permanently delete any of your content. Most Apple users will already be aware of iCloud which offers 5 GB of free storage to anyone with an iCloud account. For those who need more than 5 GB, you can purchase more iCloud storage space or you can use another cloud storage service, such as Dropbox.
Dropbox offers 3 GB of free storage, allowing users to store a wide range of files in a secure, cloud based application. Once you’ve downloaded the app, Dropbox can automate uploading your files to the cloud. This includes the Dropbox Camera Upload feature, which will upload any new photos taken with your smartphone’s camera to the cloud.
Here’s how to set up Dropbox Camera Upload:
[one_half]

[/one_half] [one_half_last]

[/one_half_last]
- Open the App Store and download Dropbox Camera Upload.
- Once the app has downloaded, open Settings.
- Then open Camera Upload.
- Inside Camera Upload, there will be three options:
- Camera Upload – turning this on will automatically upload your photos to the Dropbox.
- Use Cellular Data – this controls whether or not the app uses your data plan to upload photos.
- Background Uploading – turning this on will automatically upload your photos to Dropbox in the background of your phone.
- It is a good idea to turn off Cellular Data and turn on Background Uploading. This means that photos will be automatically uploaded in the background of your phone and only when your phone is connected to WiFi.
For those who aren’t sold on using cloud storage systems, there are number of reasons why these systems are beneficial – apart from just offering you more space on your device.
Cloud storage takes the hassle out of backing up your device because, like dropbox, most cloud storage systems have an automatic upload function. You can set the cloud storage system to automatically upload any new content to the cloud as soon as it connects to a WiFi network. You’ll never have to worry about backing up your device manually.
These types of storage systems also offer more security, not to mention convenience. When you store something on a cloud, you’ll need to sign into your account to download the content. This means that every document or media file you place on a cloud is now password protected. Also, all you need to access your content is an internet connection- which means you can access your content almost anywhere and anytime. Never worry about forgetting your usb storage device ever again – just upload your content to a cloud.
Reduce Media Quality
If you are a heavy user of music and video, you can more than double how much you can fit on your device. All you need to do is reduce the quality of your media.
While this concept might make fans of HD baulk, reducing the quality of videos and music won’t really make a difference when accessing these files on your device.

You will need to connect your phone to a computer in order to begin this process. Here are the steps.
- Connect your phone to your computer and open iTunes.
- In the left hand menu column your iPhone should appear under Devices, click on it.
- Open the Summary tab.
- Under the Options header, tick Prefer Standard Definition Videos and Convert Higher Bit Rate Songs To 128 kbps AAC.
This will ensure that when media is synced to your phone it will be a more space efficient version and you’ll be able to fit a lot more contenton your phone than before.
Delete The “Other” Items
When you connect your device to iTunes, you’re presented with a coloured bar graph of what exactly is using your storage space. Photos, video, audio, apps, books and other. Over time, the amount of space that is taken up by “other” can really add up.
So what exactly is “other?” Well it’s made up of data such as your browser cache, text messages and email attachments and if you don’t clear these things out regularly, you’ll end up with a whole lot of wasted storage space.
You might not think that messages take up a lot of space, but they can. Think about all the photos people have sent you in the past – yes, all of those are stored in your messages.
Deleting Messages
[one_half]
![]()
[/one_half] [one_half_last]

[/one_half_last]
To delete entire conversations:
- Open Messages.
- Tap Edit.
- Tap the red circle icon.
- Then tap Delete.
[one_third]

[/one_third] [one_third]

[/one_third] [one_third_last]

[/one_third_last]
To delete individual messages:
- Open Messages.
- Open the conversation.
- Tap and hold down on the message you want to delete.
- Tap More.
- Select the message.
- Tap the garbage can icon.
- Tap Delete Message.
Deleting Browser Cache

Clearing your browser cache will not only free up storage space but it will likely make your browser run faster.
You can clear your cache by following these steps:
- Open Settings.
- Open Safari.
- Tap Clear History and Clear Cookies And Data.
Deleting Email Attachments

Every time you open an email attachment the file is downloaded to your phone and after a while, these can start clogging up your phone. You can get rid of these files by deleting the email account from your phone and then re-adding it.
- Open Settings.
- Tap Mail, Contacts, Calendar.
- Tap the name of the email account.
- Scroll down and then select Delete.
To re-add the account, follow these steps.
- Open Settings.
- Scroll down and tap the Mail,Contacts, Calendars option.
- Select Add Account.
- Tap the relevant accountoption.
- Fill out the fields with your details.
- Hit Next and wait for the account to verify.
- A window will pop up asking you to verify your account. Select one of the verification options.
- Then tap Enable Device.
- If you’ve entered your details correctly, your account should now be visible under the Accounts heading in Mail, Contacts, Calendars.
Restore Your Phone
If you are serious about doing a thorough clean out of your iPhone or iPad, you have the option of restoring the device. This will delete all of your data and content and leave you with a new Apple device. This seems like a scary prospect for some, but if you have backed your device up through iCloud or through iTunes, then your important content is easily restored on the phone or iPad – just without the unnecessary documents and files that clogged up your storage space.

If you would like to restore your Apple device:
- Connect your device to your computer.
- Select the relevant device when it appears in the menu bar on the left hand side.
- Open the Summary tab.
- Click Restore
- Click Restore again to confirm.
- Your device will now be restored to its factory setting.
A shortage of storage space is an issue that has long plagued Apple users – but it doesn’t have to be that way. If you utilise all of the tips and services you have available to you, you’re storage space issues will become a thing of the past.